
Introduction to Your LABELWORKS Printer
Setting Up the Printer
Using the Label Printer With Your Mobile Device via Bluetooth®
Using with a Windows® Computer via Bluetooth®
Using with a Windows® Computer via USB
Using with a Mac Computer
Applying Your Labels
Cleaning the Printer
Solving Problems
Appendix
Notices
Top > Using with a Windows® Computer via Bluetooth® > Installing Label Editor and Connecting the Printer to Your Windows Computer
Installing Label Editor and Connecting the Printer to Your Windows Computer
 Note NoteFor instructions on how to turn on Bluetooth® on the computer, consult the documentation for the computer. |
-
Double-click the "SetUp.exe" file.
-
When the installation screen appears, click Install application and driver.
-
Follow the on-screen instructions to install Label Editor.
-
When the printer driver installation screen appears, select "LW-C650" and click Next.
-
It may take some time for the screen to be displayed.
-
It may open behind another window.
-
If the screen does not auto start, restart the "SetUp.exe" file. Select Modify then Install driver only.
-
Turn on the printer. Make sure that the lamp is fading in and out.
-
Turn on Bluetooth on the computer.
-
When the printer is found and displayed, select it and click Next.
-
When the completion message appears, click Finish.
Even if your printer is LW-C650PX, select "LW-C650".
|
Note |
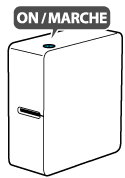
|
Note Bluetooth function can be switched between enable and disable by button operation. |
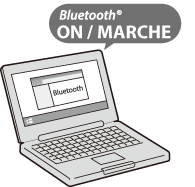
Even if your printer is LW-C650PX, select "LW-C650".
The Bluetooth printer driver is installed and the printer is connected to the computer using Bluetooth.
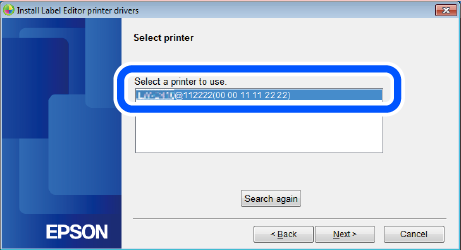
The setup procedure is now completed.
Note
|
Creating and Printing a Label
|
Note For how to use the software, please check the "Online Manual" displayed by clicking the [Help] of the software. |
-
Start the software and then select "LW-C650".
-
Perform the tape feed operation from the software.
-
Always perform the tape feed operation after inserting a tape cartridge.
-
Check the tape width setting in the software after inserting a tape cartridge.
By clicking
 , the tape width of the currently installed tape can be obtained.
 -
Create labels with the software and print.
Even if your printer is LW-C650PX, select "LW-C650".
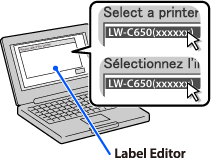
|
Note |
Introduction to Your LABELWORKS Printer
Setting Up the Printer
Using the Label Printer With Your Mobile Device via Bluetooth®
Using with a Windows® Computer via Bluetooth®
Using with a Windows® Computer via USB
Using with a Mac Computer
Applying Your Labels
Cleaning the Printer
Solving Problems
Appendix
Notices
Top > Using with a Windows® Computer via Bluetooth® > Installing Label Editor and Connecting the Printer to Your Windows Computer
Installing Label Editor and Connecting the Printer to Your Windows Computer
|
Note For instructions on how to turn on Bluetooth® on the computer, consult the documentation for the computer. |
-
Double-click the "SetUp.exe" file.
-
When the installation screen appears, click Install application and driver.
-
Follow the on-screen instructions to install Label Editor.
-
When the printer driver installation screen appears, select "LW-C650" and click Next.
-
It may take some time for the screen to be displayed.
-
It may open behind another window.
-
If the screen does not auto start, restart the "SetUp.exe" file. Select Modify then Install driver only.
-
Turn on the printer. Make sure that the lamp is fading in and out.
-
Turn on Bluetooth on the computer.
-
When the printer is found and displayed, select it and click Next.
-
When the completion message appears, click Finish.
Even if your printer is LW-C650PX, select "LW-C650".
|
Note |
|
Note Bluetooth function can be switched between enable and disable by button operation. |
Even if your printer is LW-C650PX, select "LW-C650".
The Bluetooth printer driver is installed and the printer is connected to the computer using Bluetooth.
The setup procedure is now completed.
Note
|
Creating and Printing a Label
|
Note For how to use the software, please check the "Online Manual" displayed by clicking the [Help] of the software. |
-
Start the software and then select "LW-C650".
-
Perform the tape feed operation from the software.
-
Always perform the tape feed operation after inserting a tape cartridge.
-
Check the tape width setting in the software after inserting a tape cartridge.
By clicking
, the tape width of the currently installed tape can be obtained. -
Create labels with the software and print.
Even if your printer is LW-C650PX, select "LW-C650".
|
Note |