
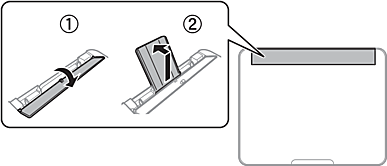
Open the feeder guard and pull out the paper support.
Slide the edge guides.
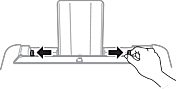
Load paper at the center of the paper support with the printable side facing up.

Do not load more than the maximum number of sheets specified for the paper. For plain paper, do not load above the line just under the  symbol inside the edge guide.
Load paper short edge first. However, when you have set the long edge as the width of the user defined size, load paper long edge first.
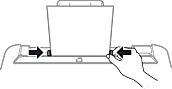
Slide the edge guides to the edges of the paper.
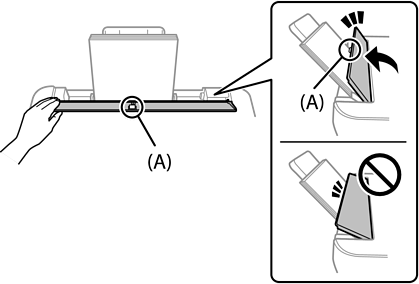
Tilt the feeder guard until part (A) is not touching the paper.
Do not place objects on the feeder guard. Doing so may prevent paper from feeding.
The feeder guard is designed to stop halfway to prevent paper feed problems. Tilt it until it stops.
Select the paper size and paper type.
For letterhead paper, select Letterhead as the paper type.
For letterhead paper, if you print on paper that is smaller than the setting in the printer driver, the printer may print beyond the edges of the paper which can lead to ink smears on your printouts and excess ink building up inside the printer. Make sure you select the correct paper size setting.
2-sided printing and borderless printing are not available for letterhead paper. Also, the print speed may be slower.
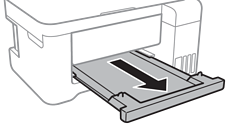
Slide out the output tray.
Return the remaining paper to its package. If you leave it in the printer, the paper may curl or the print quality may decline.