Step 3: Scanning and Saving Photos
Epson FastFoto automatically saves your scanned images on your computer in the folder you specify.
-
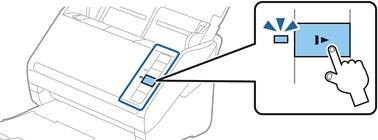
1Click the  button on the scanner to start scanning.
You can also click Start Scanning on the main screen.
-
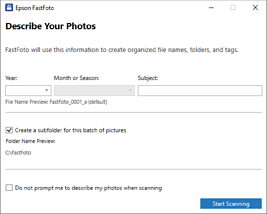
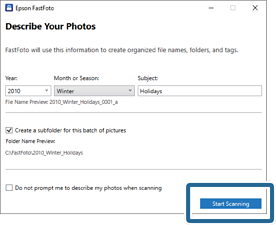
2Set the save settings on the Describe Your Photos screen.
-
Year/Month or Season/Subject: Set the file name settings.
-
Create a subfolder for this batch of pictures: Create a new subfolder for the scanned images.
-
Do not prompt me to describe my photos when scanning: Skip this screen the next time you scan. You will not be prompted to describe your photos.
-
3Click Start Scanning.
Note:
-
If the glass surface dirt alert appeared when scanning, clean the glass surface inside the scanner after scanning.
See the User's Guide supplied with the scanner for instructions on cleaning.
-
If multiple photos feed through at the same time, press the  (Slow Mode) button to slow down the feeding speed. Press the button again to return to normal speed.
-
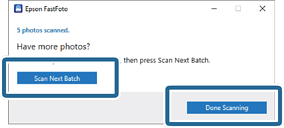
4After scanning is completed, the following screen is displayed:
If you want to continue scanning, click Scan Next Batch. If you are finished scanning, click Done Scanning.
-
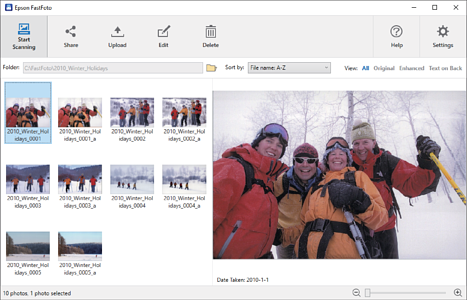
5The photos are scanned and saved in the location you chose. Check the scanned images.
The following rules apply to file naming:
-
No identifier is added: These are the original scanned images. No enhancements were applied.
-
Added "_a" at the end: These images include automatic color enhancements.
-
Added "_b" at the end: These are the scanned back sides of the photo. You can enable back side scanning from Settings > Scan Settings tab.
After scanning, you can share, upload, or edit the images using Epson FastFoto. You can also change the view setting of thumbnails.