About Epson FastFoto
How to Scan Photos
Step 1: Organizing Photos
Step 2: Placing Photos into the Scanner
Step 3: Scanning and Saving Photos
Sharing Photos
Uploading Photos
Editing Photos
Changing the Displayed Folder and Thumbnail View
Epson FastFoto Settings
Organization Tab
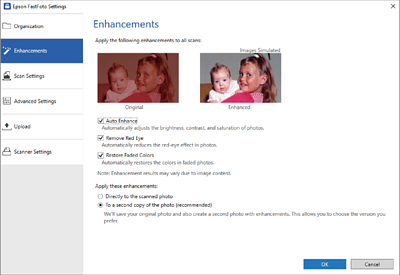
Enhancements Tab
Scan Settings Tab
Advanced Settings Tab
Upload Tab
Scanner Settings Tab
Tips for Using Epson FastFoto
Scanning Instant Photos
Scanning Panoramic Photos
Scanning Back Side Notes on Photos
Enabling or Disabling Glass Surface Dirt Alert
Changing the Application to Scan from the Scan Button
Troubleshooting
Straight Lines Appear
The Image Quality Is Poor
Pressing the Scanner Button Does Not Start Epson FastFoto
Cannot Share or Upload the Photos to a Web Service
Appendix
Internet Connection
Enhancement results may vary depending on the image contents of the photos.
Automatically adjusts the brightness, contrast, and saturation of photos.
Automatically reduces the red-eye effect in photos.
Automatically restores the colors in faded photos.
Directly to the scanned photo: Only the enhanced scanned image is saved in your folder, and the original scanned image is not saved.
To a second copy of the photo (recommended): Saves two images for each photo. One is the original scanned image, and another is the enhanced image.