After organizing your photos, place them into the scanner.
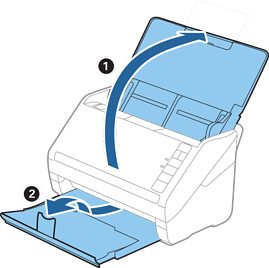
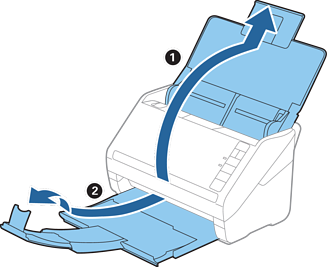
1Open the input tray, slide out the output tray, and then raise the stopper.
Note:
If you want to scan large size photos such as 5×7" or 8×10", extend the input and output tray extensions.
Make sure you adjust the position of the stopper to correctly fit the size of the ejected photos. If not, photos may scatter.
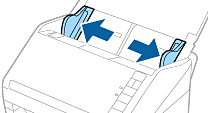
2Slide the edge guides on the input tray all the way out.
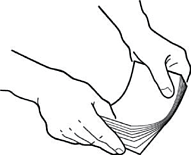
3Fan your stack of photos and make sure they are not stuck together.
Also, flatten the curls on the edge of the photos if possible.
Caution:
Stuck photos can feed through the scanner at the same time or jam in the scanner, potentially damaging your photos or the
scanner.
Note:
It is best to scan photos in an environment between 15 to 25°C (59 to 77°F) with 40 to 60% humidity. In this condition, curls
of the photos are reduced, and photos are prevented from sticking together.
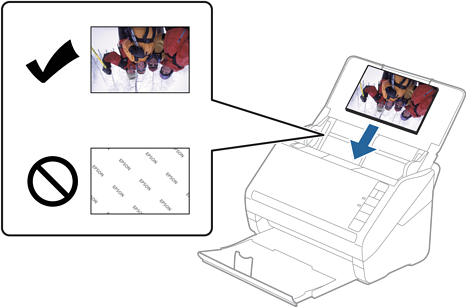
4Load the photos into the input tray face up and top edge first.
Slide the photos into the ADF until they meet resistance.
Note:
We recommend placing the photos horizontally.
You can rotate the scanned images automatically when scanning using Epson FastFoto. Click the Settings > Advanced Settings tab, and then enable Auto Rotation. Depending on the photos, they may not be rotated correctly. To rotate the scanned images manually, select the image you
want to rotate, and then click Edit > Rotate Left/Rotate Right.
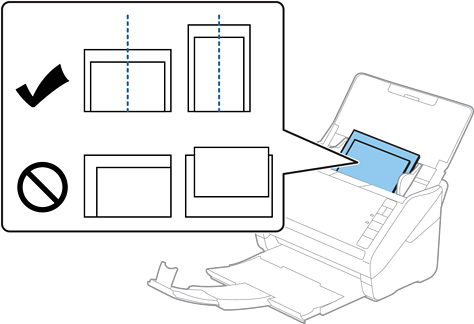
If you are loading 4×6" and 5×7" photos in the same batch, align the middle of the photos and load them at the center of the input tray with the 5×7" photos at the back and the 4×6" photos at the front.
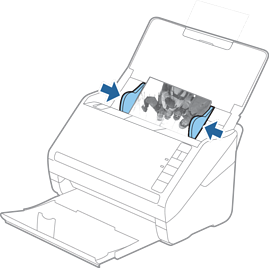
5Slide the edge guides to fit the edge of the photos making sure there are no gaps between the photos and the edge guides.
Otherwise, the photos may be fed skewed.