Introduction
Basic Operations
Creating a Variety of Labels
Printing
Changing Preference Settings
Appendix
Top > Basic Operations > Creating a New Label
Creating a New Label
-
Start Label Editor.
-
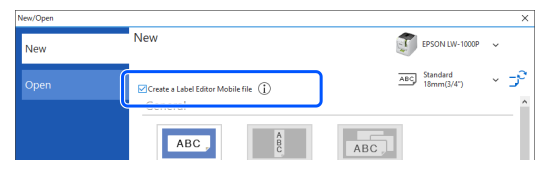
Select the printer and tape you want to use.
-
If the tape settings are not updated by clicking , select the tape installed in the printer from the pull-down menu.
-
Select the check box for Create a Label Editor Mobile file to create label data to be used in Label Editor Mobile which is an app for smart devices.
 Creating Labels for Label Editor Mobile
-
Select a label type you want to create.
-
A template for the selected label type is displayed. Insert objects such as text and symbol.
-
Click to print the file.
The New/Open window is displayed. You can also open the window by clicking .
Click to update the tape settings to detected type and width of tape installed in the printer.

 Note: Note: |
For example, select [1] Horizontal Text.
|
Note: Label types that are not available with the set tape are grayed out and not selectable. |

|
1. |
Lets you create a horizontal writing label. |
|
2. |
Lets you create a vertical writing label. |
|
3. |
|
|
4. | |
|
5. | |
|
6. |
|

Introduction
Basic Operations
Creating a Variety of Labels
Printing
Changing Preference Settings
Appendix
Top > Basic Operations > Creating a New Label
Creating a New Label
-
Start Label Editor.
-
Select the printer and tape you want to use.
-
If the tape settings are not updated by clicking , select the tape installed in the printer from the pull-down menu.
-
Select the check box for Create a Label Editor Mobile file to create label data to be used in Label Editor Mobile which is an app for smart devices.
Creating Labels for Label Editor Mobile
-
Select a label type you want to create.
-
A template for the selected label type is displayed. Insert objects such as text and symbol.
-
Click to print the file.
The New/Open window is displayed. You can also open the window by clicking .
Click to update the tape settings to detected type and width of tape installed in the printer.
|
Note: |
For example, select [1] Horizontal Text.
|
Note: Label types that are not available with the set tape are grayed out and not selectable. |
|
1. |
Lets you create a horizontal writing label. |
|
2. |
Lets you create a vertical writing label. |
|
3. |
|
|
4. | |
|
5. | |
|
6. |
|