Introduction
Basic Operations
Creating a Variety of Labels
Printing
Changing Preference Settings
Appendix
Top > Creating a Variety of Labels > Creating a Large Label by Printing One Image on Multiple Labels
Creating a Large Label by Printing One Image on Multiple Labels
You can divide one label image into specified number of pieces and print them. By pasting the printed pieces of the label together, a large label can be created.
Example:

 Note: Note:
|
-
Specify the number of pieces of a label in Print-Paste Printing.
-
Enter a text.
-
Format the label by adjusting position of blocks, font size, etc.
-
Click to print the file.
Dotted lines are displayed as the dividing lines.
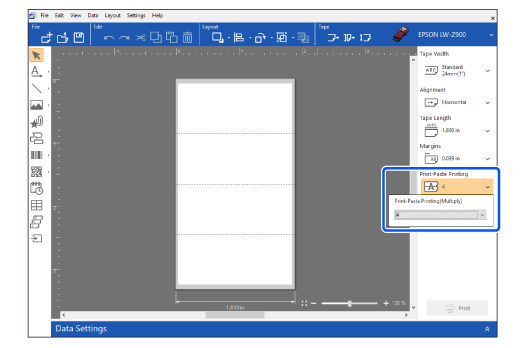
You can print all pieces or select which piece to print.
 Printing Labels created using the Print-Paste Printing Function (Advanced Settings)
Introduction
Basic Operations
Creating a Variety of Labels
Printing
Changing Preference Settings
Appendix
Top > Creating a Variety of Labels > Creating a Large Label by Printing One Image on Multiple Labels
Creating a Large Label by Printing One Image on Multiple Labels
You can divide one label image into specified number of pieces and print them. By pasting the printed pieces of the label together, a large label can be created.
Example:
Note:
|
-
Specify the number of pieces of a label in Print-Paste Printing.
-
Enter a text.
-
Format the label by adjusting position of blocks, font size, etc.
-
Click to print the file.
Dotted lines are displayed as the dividing lines.
You can print all pieces or select which piece to print.
Printing Labels created using the Print-Paste Printing Function (Advanced Settings)