Introduction
Basic Operations
Creating a Variety of Labels
Printing
Changing Preference Settings
Appendix
Top > Basic Operations > Setting Label Length
Setting Label Length
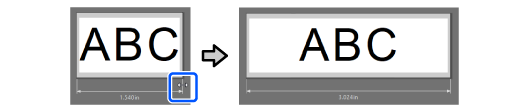
By default, the label length automatically changes according to the objects inserted in the Layout editing window. The following explains how to set the label length manually.
-
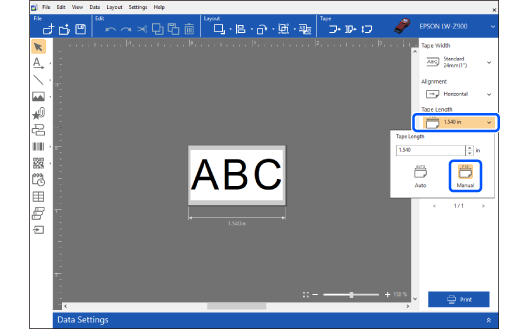
In the tape settings area, click on the tape length setting, and then select Manual.
-
Use one of the following methods to set the length.
-
Enter a length in the Tape Length box.
-
Drag the vertical line located below the right corner of the label.
Introduction
Basic Operations
Creating a Variety of Labels
Printing
Changing Preference Settings
Appendix
Top > Basic Operations > Setting Label Length
Setting Label Length
By default, the label length automatically changes according to the objects inserted in the Layout editing window. The following explains how to set the label length manually.
-
In the tape settings area, click on the tape length setting, and then select Manual.
-
Use one of the following methods to set the length.
-
Enter a length in the Tape Length box.
-
Drag the vertical line located below the right corner of the label.