Introduction
Basic Operations
Creating a Variety of Labels
Printing
Changing Preference Settings
Appendix
Top > Creating a Variety of Labels > Creating Labels Using an Excel or Other Format File
Creating Labels Using an Excel or Other Format File
You can create a large number of labels easily by importing your existing Excel, csv, or other format file.
-
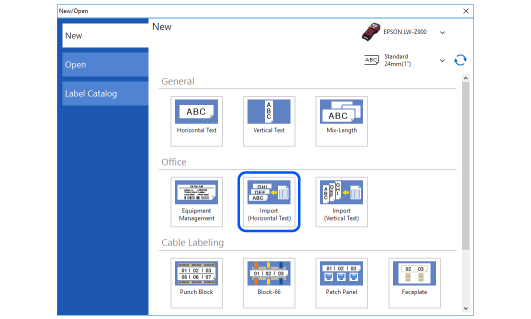
Click on the tool bar.
-
Click Import (Horizontal Text) or Import (Vertical Text).
-
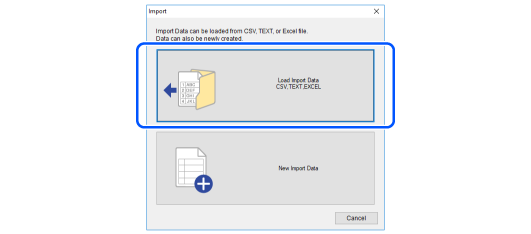
Click Load Import Data. When a file selection dialog box is displayed, select and open a file you want to import.
-
Click Overwrite Current Data.
-
Select which worksheet to import, and then click OK.
-
Insert the data from the Data creation window to the Layout editing window, and then format a label.
-
Click to print the file.
If the first row of the file is used as a header row, select the check box for Use first row as column headers.

A blank label image is displayed in the Layout editing window, and the imported data is displayed in the Data creation window.
To insert barcode or image data, change the column attribute before inserting it.
 How to Operate the Data Creation Window
 Note:
Note:Introduction
Basic Operations
Creating a Variety of Labels
Printing
Changing Preference Settings
Appendix
Top > Creating a Variety of Labels > Creating Labels Using an Excel or Other Format File
Creating Labels Using an Excel or Other Format File
You can create a large number of labels easily by importing your existing Excel, csv, or other format file.
-
Click on the tool bar.
-
Click Import (Horizontal Text) or Import (Vertical Text).
-
Click Load Import Data. When a file selection dialog box is displayed, select and open a file you want to import.
-
Click Overwrite Current Data.
-
Select which worksheet to import, and then click OK.
-
Insert the data from the Data creation window to the Layout editing window, and then format a label.
-
Click to print the file.
If the first row of the file is used as a header row, select the check box for Use first row as column headers.
A blank label image is displayed in the Layout editing window, and the imported data is displayed in the Data creation window.
To insert barcode or image data, change the column attribute before inserting it.
How to Operate the Data Creation Window