Scanning Photos or Pictures (Photo Mode)
Using Photo Mode in Epson Scan 2, you can scan originals with wide variety of image adjustment features that are suitable for photos or pictures.
-
Place the originals.
By placing multiple originals on the scanner glass, you can scan them all at the same time. Make sure there is a gap of at least 20 mm between the originals.
Note:You cannot use ADF when scanning from Photo Mode.
-
Start Epson Scan 2.
-
Select Photo Mode from the Mode list.
-
Make the following settings on the Main Settings tab.

-
Image Type: Select the color for saving the scanned image.
-
Resolution: Select the resolution.
Note:The Document Source setting is fixed as Scanner Glass, and the Document Type setting is fixed as Reflective. (Reflective means originals which are not transparent, for example ordinary papers or photos.) You cannot change these settings.
-
-
Click Preview.
The preview window opens, and the previewed images are displayed as thumbnails.
 Note:
Note:To preview the entire scanned area, clear the Thumbnail check box at the top of the preview widow.
-
Confirm the preview, and make image adjustment settings on the Advanced Settings tab if necessary.

You can adjust the scanned image using detailed settings that are suitable for photos or pictures, such as the following.
-
Brightness: You can adjust the brightness for the scanned image.
-
Contrast: You can adjust the contrast for the scanned image.
-
Saturation: You can adjust the saturation (color vividness) for the scanned image.
-
Unsharp Mask: You can enhance and sharpen the outlines of the scanned image.
-
Color Restoration: You can correct images that have faded to return them to their original colors.
-
Backlight Correction: You can lighten scanned images that are dark due to backlight.
-
Descreening: You can remove moiré patterns (web-like shadows) that appear when scanning printed papers such as a magazine.
-
Dust Removal: You can remove dust on the scanned image.
Note:-
The items may not be available depending on other settings you made.
-
Depending on the original, the scanned image may not be adjusted correctly.
-
When multiple thumbnails are created, you can adjust the image quality for each thumbnail. Depending on the adjustment items, you can adjust the quality of scanned images all together by selecting multiple thumbnails.
-
-
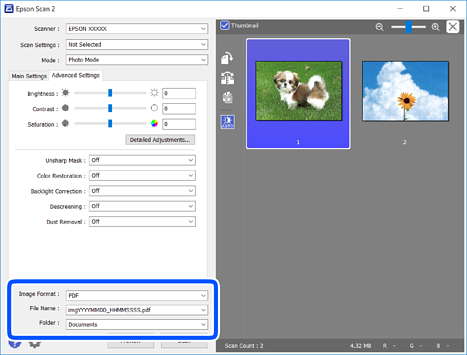
Set the file saving settings.
-
Image Format: Select the save format from the list.You can make detailed settings for each save format except BITMAP and PNG. Select Options from the list after selecting the save format.
-
File Name: Confirm the save file name displayed.You can change settings for the file name by selecting Settings from the list.
-
Folder: Select the save folder for the scanned image from the list.You can select another folder or create a new folder by selecting Select from the list.
-
-
Click Scan.
