-
-
-
-
-
-
Network Service and Software Information
-
Application for Scanning Documents and Images (Epson Scan 2)
-
Application for Configuring Scanning Operations from the Control Panel (Epson Event Manager)
-
Application for Configuring Fax Operations and Sending Faxes (FAX Utility)
-
Application for Quick and Fun Printing from a Computer (Epson Photo+)
-
Application for Easily Operating the Printer from a Smart device (Epson Smart Panel)
-
Application for Updating Software and Firmware (Epson Software Updater)
-
Application for Setting up the Device on a Network (EpsonNet Config)
-
-
-
Colored Banding Appears at Intervals of Approximately 2.5 cm
-
The Position, Size, or Margins of the Printout Are Incorrect
-
Uneven Colors, Smears, Dots, or Straight Lines Appear in the Copied Image
-
An Image of the Reverse Side of the Original Appears in the Copied Image
-
The Text or Image Copied from the ADF is Squeezed or Stretched
-
-
Connecting Your Phone Device to the Printer
When using the printer and your telephone on a single phone line, connect the telephone to the printer.
-
If your phone device has a fax function, disable the fax function before connecting. See the manuals that came with the phone device for details.
-
If you connect an answering machine, make sure the printer's Rings to Answer setting is set higher than the number of rings your answering machine is set to answer a call.
-
Remove the cap from the EXT. port on the back of the printer.
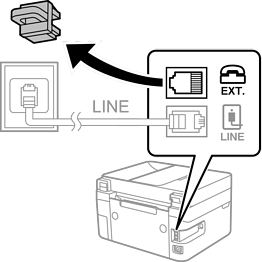
-
Connect the phone device and the EXT. port with a phone cable.
 Note:
Note:When sharing a single phone line, make sure you connect the phone device to the EXT. port of the printer. If you split the line to connect the phone device and the printer separately, the phone and the printer do not work correctly.
-
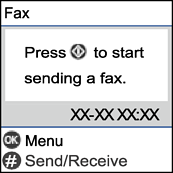
Select Fax on the home screen.
To select an item, use the


 buttons, and then press the
OK button.
buttons, and then press the
OK button.
-
Pick up the handset.
A connection has been established when the message to press
 to start sending or receiving a fax is displayed on the screen.