
Before Using the Printer
Part Names
Setup of the Printer
Setup of the Tablet
Basic Operations
Cleaning
Troubleshooting
Appendix
Top > Setup of the Printer > Connecting Cables
Connecting Cables
Connect an interface cable of a peripheral device to the connector inside the printer.
-
Turn off the printer.
-
Disconnect the AC cable plug from the power outlet.
-
Dismount the front tablet and the rear display.
-
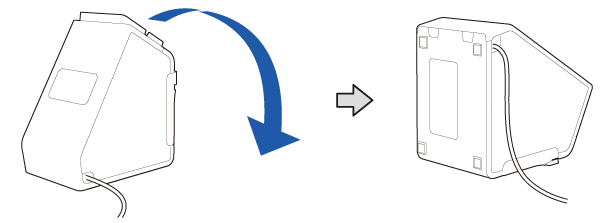
Lay the printer down.
-
Put your fingers on the cutouts and open the bottom cover to remove it.
-
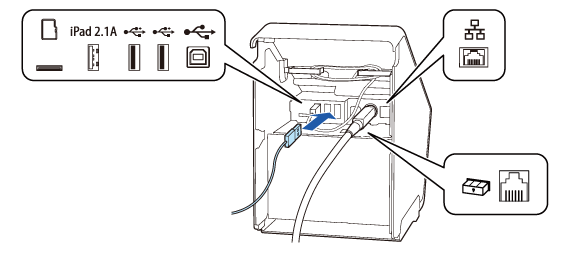
Connect an interface cable to the connector inside the printer.
-
Check that the DC cable is securely connected to the power supply connector.
-
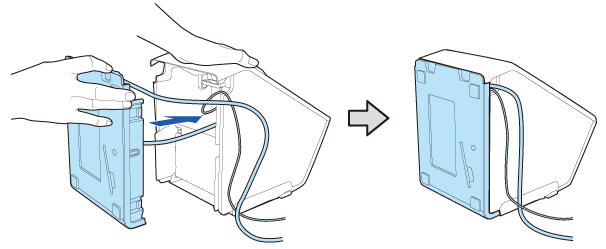
Stand the bottom cover, and push the cover horizontally toward the printer body to engage it.
Take care not to let the AC cable and the interface cable get caught between the frames. -
Pass the interface cable through the cutout to pull it out from the printer.
-
Take care not to push the AC adapter. Doing so will cause the AC adapter to come off.
 How to Attach the AC Adapter
-
Connect the interface cable to the device.
-
Connect the AC cable plug to a power outlet.
Mounting/Dismounting the Front Tablet
Mounting/Dismounting the Rear Display

For information on which connector is which type, see Connectors.

 Note:
Note: WARNING:
-
Never insert the AC cable plug into a socket that does not meet the input voltage of the AC adapter. Doing so may result in damage to the printer.
-
Should a fault ever occur, immediately turn off the power to the printer and unplug the AC cable from the socket.
Before Using the Printer
Part Names
Setup of the Printer
Setup of the Tablet
Basic Operations
Cleaning
Troubleshooting
Appendix
Top > Setup of the Printer > Connecting Cables
Connecting Cables
Connect an interface cable of a peripheral device to the connector inside the printer.
-
Turn off the printer.
-
Disconnect the AC cable plug from the power outlet.
-
Dismount the front tablet and the rear display.
-
Lay the printer down.
-
Put your fingers on the cutouts and open the bottom cover to remove it.
-
Connect an interface cable to the connector inside the printer.
-
Check that the DC cable is securely connected to the power supply connector.
-
Stand the bottom cover, and push the cover horizontally toward the printer body to engage it.
Take care not to let the AC cable and the interface cable get caught between the frames. -
Pass the interface cable through the cutout to pull it out from the printer.
-
Take care not to push the AC adapter. Doing so will cause the AC adapter to come off.
How to Attach the AC Adapter
-
Connect the interface cable to the device.
-
Connect the AC cable plug to a power outlet.
Mounting/Dismounting the Front Tablet
Mounting/Dismounting the Rear Display
For information on which connector is which type, see Connectors.
Note:WARNING:-
Never insert the AC cable plug into a socket that does not meet the input voltage of the AC adapter. Doing so may result in damage to the printer.
-
Should a fault ever occur, immediately turn off the power to the printer and unplug the AC cable from the socket.