
Before Using the Printer
Part Names
Setup of the Printer
Setup of the Tablet
Basic Operations
Cleaning
Troubleshooting
Appendix
Top > Setup of the Tablet > Attaching the Attachment to the Front Tablet
Attaching the Attachment to the Front Tablet
Follow the procedure below to attach the front tablet attachment to a tablet to be mounted to the printer as a front tablet.
-
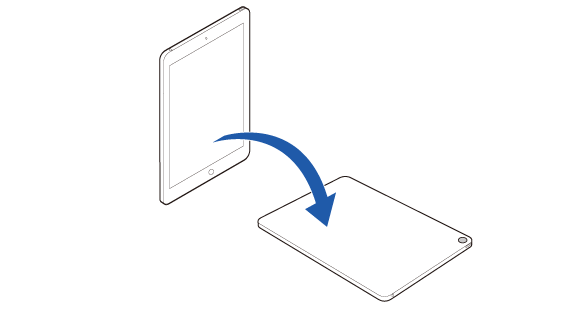
Place the tablet screen-side down on the work table.
-
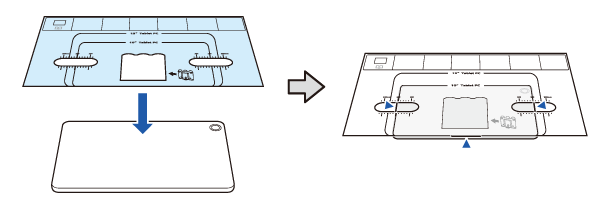
Place the attachment guide sheet on the tablet following the guidelines below, then secure the sheet.
-
Smooth out creases of the sheet as much as possible.
-
Align the bottom edge of the sheet with the bottom edge of the tablet.
-
Align the same left and right scale marks on the sheet with the side edges of the tablet.
-
Temporarily secure the sheet to the tablet with pieces of tape.
-
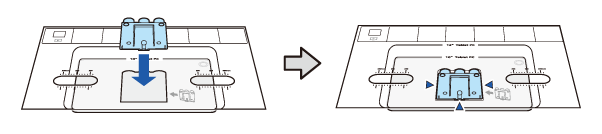
Remove the three backing sheets from the front tablet attachment.
-
Attach the attachment as shown below. Take care not to attach it diagonally.
-
Press the attachment firmly for about 30 seconds.
-
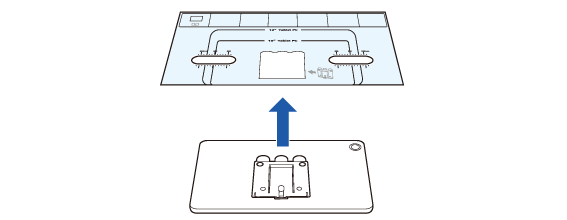
Remove the attachment guide sheet from the tablet.
If the tablet has a camera, place the tablet so that the camera is at the far right corner.


Before Using the Printer
Part Names
Setup of the Printer
Setup of the Tablet
Basic Operations
Cleaning
Troubleshooting
Appendix
Top > Setup of the Tablet > Attaching the Attachment to the Front Tablet
Attaching the Attachment to the Front Tablet
Follow the procedure below to attach the front tablet attachment to a tablet to be mounted to the printer as a front tablet.
-
Place the tablet screen-side down on the work table.
-
Place the attachment guide sheet on the tablet following the guidelines below, then secure the sheet.
-
Smooth out creases of the sheet as much as possible.
-
Align the bottom edge of the sheet with the bottom edge of the tablet.
-
Align the same left and right scale marks on the sheet with the side edges of the tablet.
-
Temporarily secure the sheet to the tablet with pieces of tape.
-
Remove the three backing sheets from the front tablet attachment.
-
Attach the attachment as shown below. Take care not to attach it diagonally.
-
Press the attachment firmly for about 30 seconds.
-
Remove the attachment guide sheet from the tablet.
If the tablet has a camera, place the tablet so that the camera is at the far right corner.