
Before Using the Printer
Part Names
Setup of the Printer
Setup of the Tablet
Basic Operations
Cleaning
Troubleshooting
Appendix
Top > Setup of the Tablet > Preparing for Mounting the Front Tablet
Preparing for Mounting the Front Tablet
Follow the procedure below to make preparations for mounting the front tablet to the printer.
-
Raise the front tablet holding part.
-
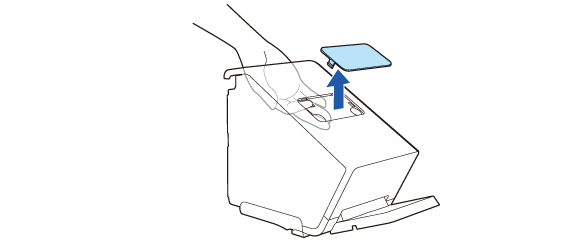
Remove the rear display section cover.
-
Remove the two screws.
-
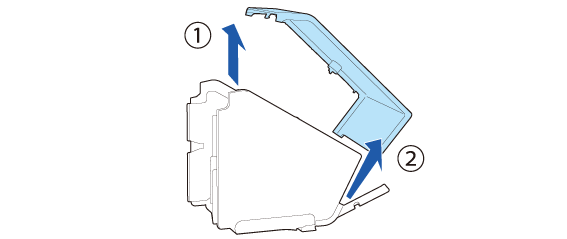
Remove the rear cover.
-
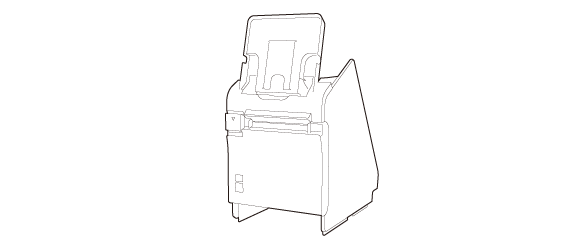
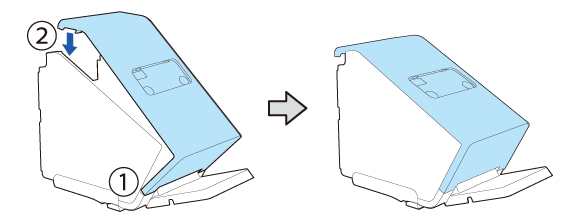
Stand the printer.
-
Run the tablet cable through the printer.
-
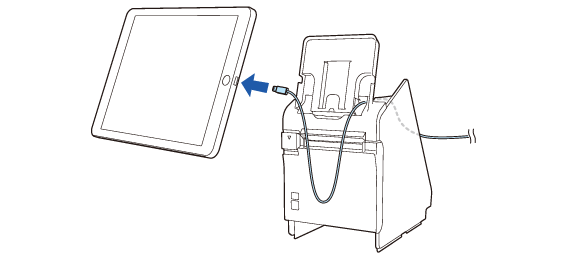
Connect the cable to the front tablet.
-
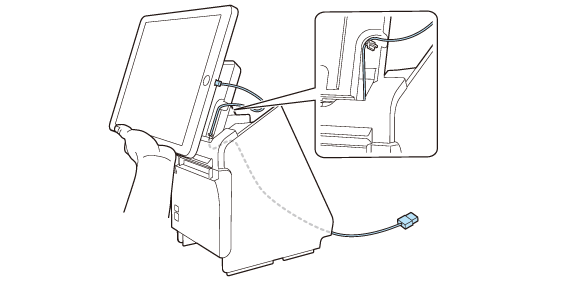
Supporting the tablet with your hand, adjust the cable length that is coming out from the printer. Ensure enough length of the cable to prevent it from being bent at a sharp angle.
-
Route the cable along the tab.
-
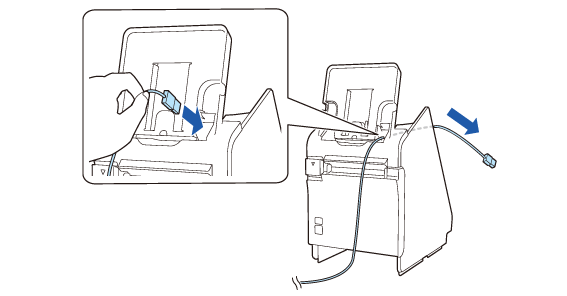
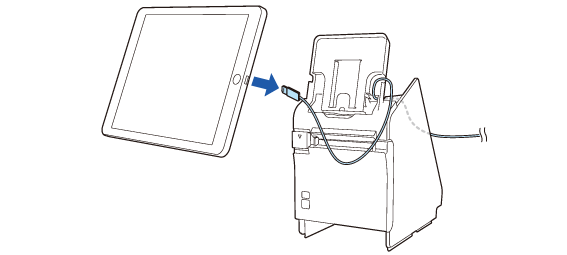
Disconnect the cable from the tablet.
-
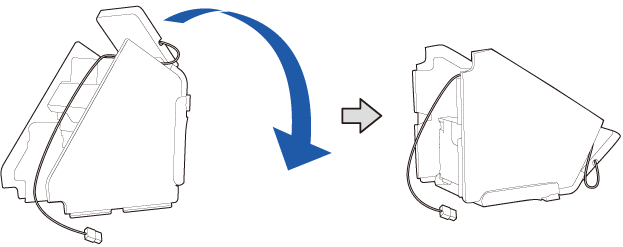
Lay the printer down.
-
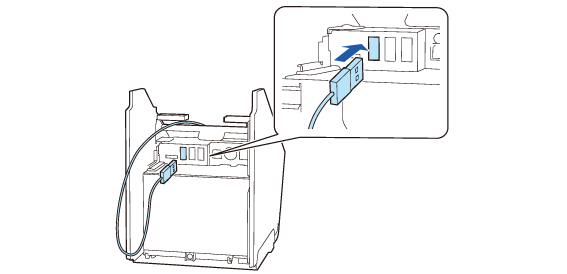
Connect the cable to the USB connector (USB-A - Device Charging).
-
See the link below for information about the tablets that can be connected to the USB connector (USB-A - Device Charging).
 Tablets that Can be Mounted to the Printer
-
If your tablet is not allowed to connect to the connector of the printer, pull out its cable through the cutout of the printer.
Attaching the Bottom Cover
-
Run the cable through the center cable clamp, then run it through the clamps on the both sides.
-
Attach the rear cover.
-
Secure the cover with the two screws.
-
Attach the rear display section cover.


 CAUTION:
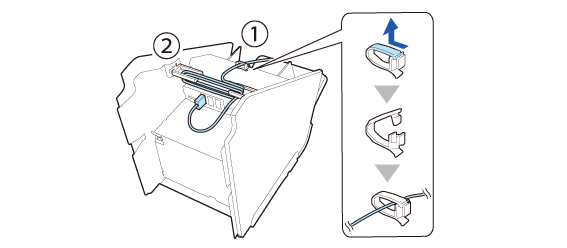
When mounting a rear display, go to Mounting the Rear Display.

Go to Attaching the Bottom Cover.

Before Using the Printer
Part Names
Setup of the Printer
Setup of the Tablet
Basic Operations
Cleaning
Troubleshooting
Appendix
Top > Setup of the Tablet > Preparing for Mounting the Front Tablet
Preparing for Mounting the Front Tablet
Follow the procedure below to make preparations for mounting the front tablet to the printer.
-
Raise the front tablet holding part.
-
Remove the rear display section cover.
-
Remove the two screws.
-
Remove the rear cover.
-
Stand the printer.
-
Run the tablet cable through the printer.
-
Connect the cable to the front tablet.
-
Supporting the tablet with your hand, adjust the cable length that is coming out from the printer. Ensure enough length of the cable to prevent it from being bent at a sharp angle.
-
Route the cable along the tab.
-
Disconnect the cable from the tablet.
-
Lay the printer down.
-
Connect the cable to the USB connector (USB-A - Device Charging).
-
See the link below for information about the tablets that can be connected to the USB connector (USB-A - Device Charging).
Tablets that Can be Mounted to the Printer
-
If your tablet is not allowed to connect to the connector of the printer, pull out its cable through the cutout of the printer.
Attaching the Bottom Cover
-
Run the cable through the center cable clamp, then run it through the clamps on the both sides.
-
Attach the rear cover.
-
Secure the cover with the two screws.
-
Attach the rear display section cover.
CAUTION:When mounting a rear display, go to Mounting the Rear Display.
Go to Attaching the Bottom Cover.