
Before Using the Printer
Part Names
Setup of the Printer
Setup of the Tablet
Basic Operations
Cleaning
Troubleshooting
Appendix
Top > Setup of the Printer > Using the Power Switch Cover
Using the Power Switch Cover
By attaching the power switch cover supplied, you can prevent accidental operations of the  Power switch. You can press the Power switch by inserting a sharp-pointed object in the holes on the power switch cover.
Peel off the tape on the back of the power switch cover, and then attach the cover to the printer.

 WARNING:
If an accident occurs with the power switch cover attached, unplug the power cord immediately. Continued use may cause fire or shock.
Before Using the Printer
Part Names
Setup of the Printer
Setup of the Tablet
Basic Operations
Cleaning
Troubleshooting
Appendix
Top > Setup of the Printer > Using the Power Switch Cover
Using the Power Switch Cover
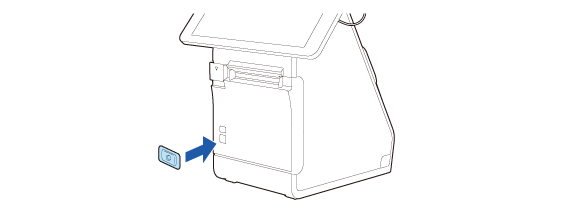
By attaching the power switch cover supplied, you can prevent accidental operations of the Power switch. You can press the Power switch by inserting a sharp-pointed object in the holes on the power switch cover.
Peel off the tape on the back of the power switch cover, and then attach the cover to the printer.
WARNING:If an accident occurs with the power switch cover attached, unplug the power cord immediately. Continued use may cause fire or shock.