
Before Using the Printer
Part Names
Setup of the Printer
Setup of the Tablet
Basic Operations
Cleaning
Troubleshooting
Appendix
Top > Setup of the Tablet > Mounting/Dismounting the Front Tablet
Mounting/Dismounting the Front Tablet
Follow the procedure below to mount or dismount the front tablet.
 Note:
Note:Two types of screws are provided for securing the front tablet. Use one of them that matches your purpose.
-
Thumb screw
You can tighten or loosen the screw with your hand, so it is easy to mount or dismount the tablet.
-
Screw
The included hexagonal spanner is needed to tighten or loosen the screw. This helps in preventing the tablet from being stolen.

Mounting the Front Tablet
-
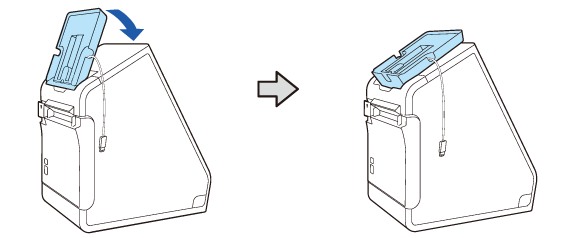
Tilt the front tablet holding part back.
-
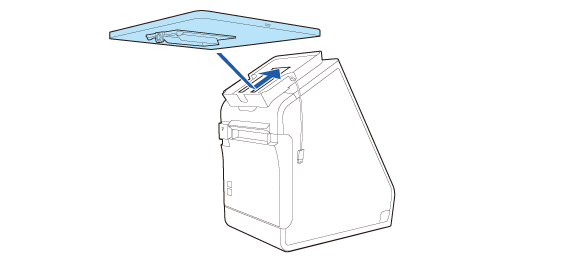
Fit the tablet in the tablet holding part.
-
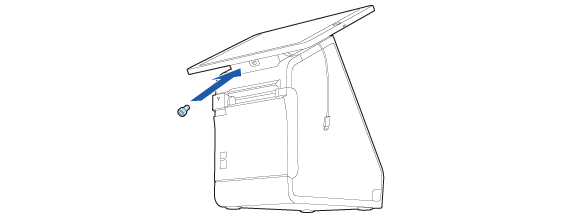
Secure the tablet using the included thumb screw or screw.
-
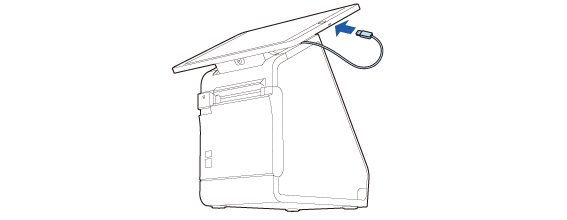
Connect the cable to the tablet.
Adjusting the Angle of the Front Tablet
To make the screen easier to see, you can adjust the angle of the front tablet.
Hold the both sides of the tablet with your hands, then change the angle. The angle can be adjusted steplessly within the range of 40 degrees.

 CAUTION:
Do not attempt to move the front tablet beyond the adjustable range, and do not adjust the angle holding the upper edge of the tablet. Doing so may cause the tablet and the printer to be exposed to excessive force resulting in getting damaged.
Dismounting the Front Tablet
-
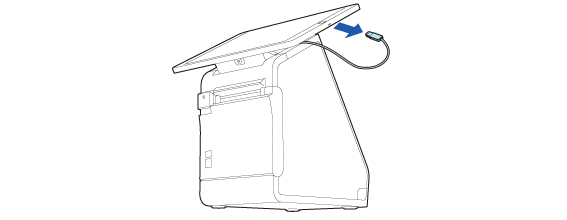
Tilt the front tablet back.
-
Disconnect the cable from the tablet.
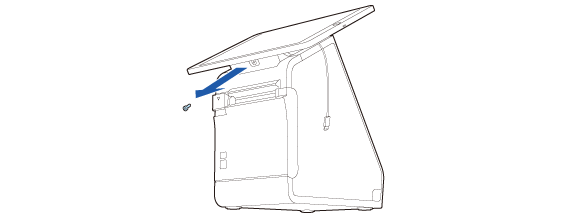
-
Remove the screw and then dismount the front tablet.

Store the screw and be careful not to lose it.
Before Using the Printer
Part Names
Setup of the Printer
Setup of the Tablet
Basic Operations
Cleaning
Troubleshooting
Appendix
Top > Setup of the Tablet > Mounting/Dismounting the Front Tablet
Mounting/Dismounting the Front Tablet
Follow the procedure below to mount or dismount the front tablet.
Note:Two types of screws are provided for securing the front tablet. Use one of them that matches your purpose.
-
Thumb screw
You can tighten or loosen the screw with your hand, so it is easy to mount or dismount the tablet.
-
Screw
The included hexagonal spanner is needed to tighten or loosen the screw. This helps in preventing the tablet from being stolen.
Mounting the Front Tablet
-
Tilt the front tablet holding part back.
-
Fit the tablet in the tablet holding part.
-
Secure the tablet using the included thumb screw or screw.
-
Connect the cable to the tablet.
Adjusting the Angle of the Front Tablet
To make the screen easier to see, you can adjust the angle of the front tablet.
Hold the both sides of the tablet with your hands, then change the angle. The angle can be adjusted steplessly within the range of 40 degrees.
CAUTION:Do not attempt to move the front tablet beyond the adjustable range, and do not adjust the angle holding the upper edge of the tablet. Doing so may cause the tablet and the printer to be exposed to excessive force resulting in getting damaged.
Dismounting the Front Tablet
-
Tilt the front tablet back.
-
Disconnect the cable from the tablet.
-
Remove the screw and then dismount the front tablet.
Store the screw and be careful not to lose it.