
Before Using the Printer
Part Names
Setup of the Printer
Setup of the Tablet
Basic Operations
Cleaning
Troubleshooting
Appendix
Top > Setup of the Tablet > Mounting the Rear Display
Mounting the Rear Display
Follow the procedure below to mount the rear display to the printer.
-
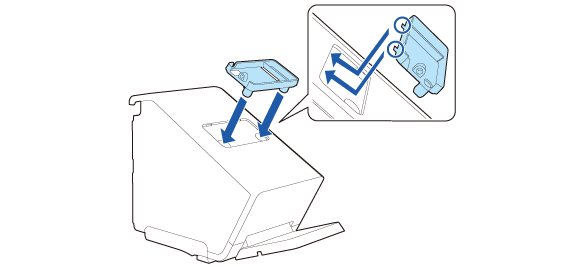
Attach the rear display fixture.
-
Secure the fixture with the two screws.
-
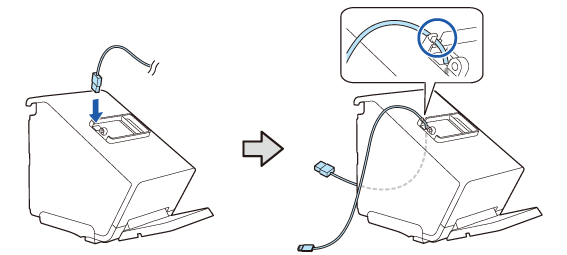
Run the cable of the display through the printer.
-
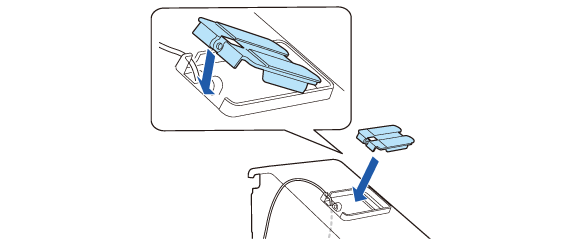
Attach the rear display attachment.
-
Secure it with the included screw.
-
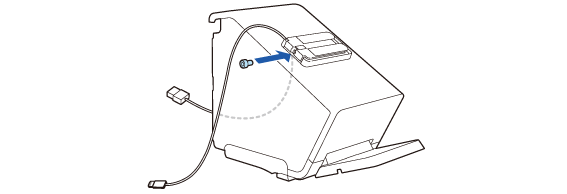
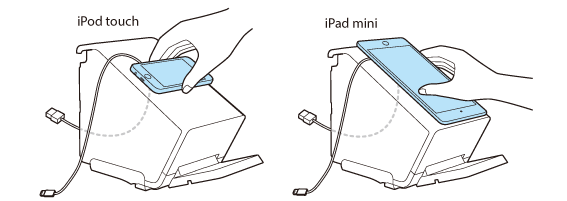
Place the display on the attachment to check the pasting position.
-
Place the display horizontally.
-
For iPod touch, face its connector side toward the screwing side.
-
For iPad mini, face its connector side toward the bottom of the printer.
-
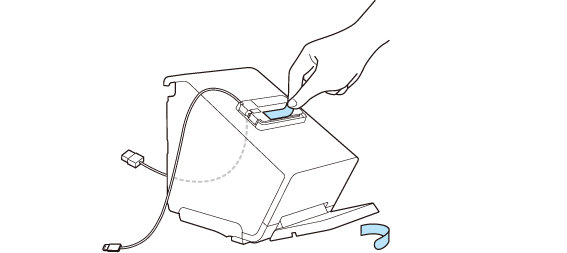
Remove the two backing sheets.
-
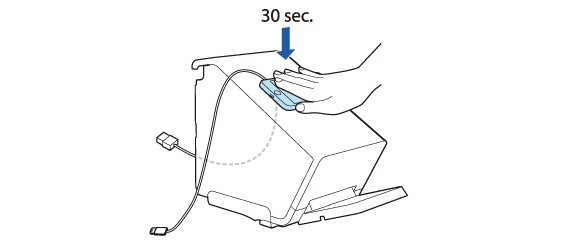
Place the device on the attachment, then press it firmly for about 30 seconds.
-
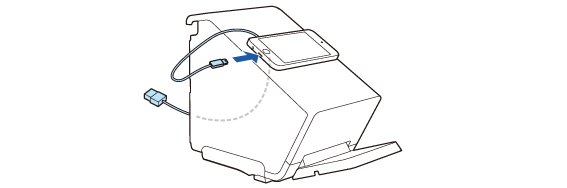
Connect the cable to the device.
-
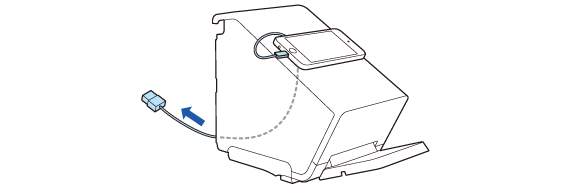
Adjust the cable length that is coming out from the printer. Ensure enough length of cable to prevent it from being bent at a sharp angle.
-
Connect the cable to the USB-A connector.
-
See the link below for information about the displays that can be connected to the USB-A connector.
 Tablets that Can be Mounted to the Printer
-
If your device is not allowed to connect to the connector of the printer, pull out its cable through the cutout of the printer.
Attaching the Bottom Cover
-
Bundle the excess cable by routing it through clamps on the both sides.


 CAUTION:
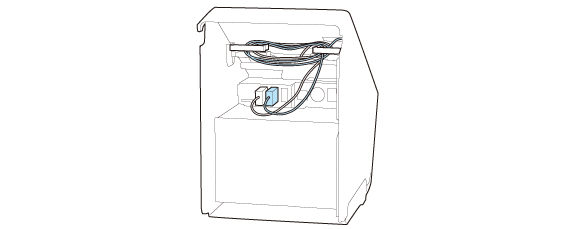
Before Using the Printer
Part Names
Setup of the Printer
Setup of the Tablet
Basic Operations
Cleaning
Troubleshooting
Appendix
Top > Setup of the Tablet > Mounting the Rear Display
Mounting the Rear Display
Follow the procedure below to mount the rear display to the printer.
-
Attach the rear display fixture.
-
Secure the fixture with the two screws.
-
Run the cable of the display through the printer.
-
Attach the rear display attachment.
-
Secure it with the included screw.
-
Place the display on the attachment to check the pasting position.
-
Place the display horizontally.
-
For iPod touch, face its connector side toward the screwing side.
-
For iPad mini, face its connector side toward the bottom of the printer.
-
Remove the two backing sheets.
-
Place the device on the attachment, then press it firmly for about 30 seconds.
-
Connect the cable to the device.
-
Adjust the cable length that is coming out from the printer. Ensure enough length of cable to prevent it from being bent at a sharp angle.
-
Connect the cable to the USB-A connector.
-
See the link below for information about the displays that can be connected to the USB-A connector.
Tablets that Can be Mounted to the Printer
-
If your device is not allowed to connect to the connector of the printer, pull out its cable through the cutout of the printer.
Attaching the Bottom Cover
-
Bundle the excess cable by routing it through clamps on the both sides.
CAUTION: