Replacing Ink Cartridges (When Ink Light is On or Flashing)
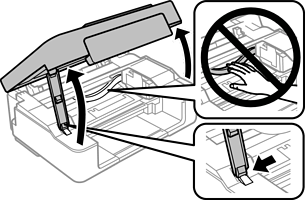
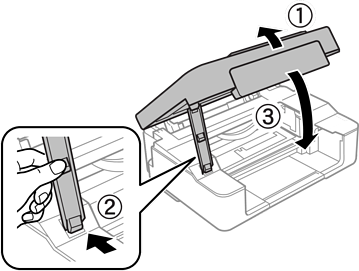
Be careful not to trap your hand or fingers when opening or closing the scanner unit. Otherwise you may be injured.
If you replace the ink cartridges while copying, the originals may move out of place. Press the  button to cancel and replace the originals.
-
Open the scanner unit with the document cover closed.
-
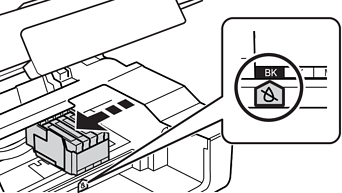
Operate the printer's buttons to move the ink cartridge holder.
Note:Replace the cartridge that stops at the
 icon. If there are more expended ink cartridges, the cartridge moves to the icon every time you press the button.
-
If the
 light is on (one or more ink cartridges are expended)
Press the button. The ink cartridge holder moves to the icon. You cannot replace cartridges in this position. Go to the next step.
light is on (one or more ink cartridges are expended)
Press the button. The ink cartridge holder moves to the icon. You cannot replace cartridges in this position. Go to the next step.
-
If the light flashes (one or more ink cartridges are running low)
Hold down the button for 10 seconds. The ink cartridge holder moves to the icon. You cannot replace cartridges in this position. Go to the next step.
Note:To cancel ink cartridge replacement, keep the ink cartridges installed and turn off the printer.
-
-
Press the
button again.
The ink cartridge holder moves to the replacement position.

-
When replacing the black ink cartridge, gently shake the new black ink cartridge four or five times and then remove it from its package. When replacing other color cartridges, remove the new color cartridges from their package without shaking.
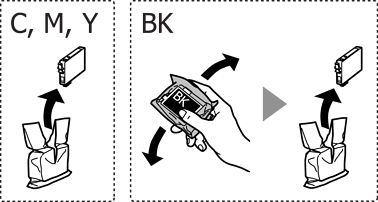 Important:
Do not shake cartridges after opening the package, as they may leak.
-
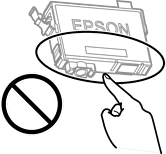
Remove only the yellow tape.
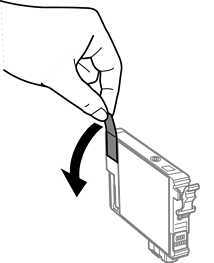 Important:
Do not touch the sections shown in the illustration. Doing so may prevent normal operation and printing.
-
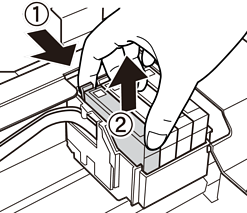
Squeeze the tab on the ink cartridge and pull it straight up. If you cannot remove the ink cartridge, pull it firmly.
-
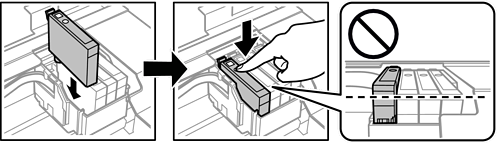
Insert the new ink cartridge, and then press it down firmly.
-
Close the scanner unit.
-
Press the
button.
Ink charging starts.
Important:After installing the ink cartridge, the power and ink light will continues to flash while the printer is charging ink. Do not turn off the printer during ink charging. Charging takes approximately two minutes. If the ink charging is incomplete, you may not be able to print.
Note:If the
light does not turn off, try removing and reinserting the ink cartridge.
