This explanation is an example for creating the shared folder on the desktop of the user currently logging in to the computer.
The user who logs in to the computer and who has administrator authority can access the desktop folder and the document folder that are under the User folder.
Set this configuration when you DO NOT permit reading and writing to another user to the shared folder on a personal computer.
Place for creating shared folder: Desktop
Folder path: C:\Users\xxxx\Desktop\scan_folder
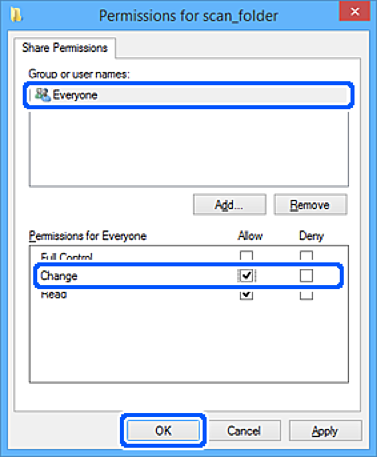
Access permission via network (Share Permissions): Everyone
Access permission on file system (Security): do not add, or add User/Group names to permit access
Log in to the computer where the shared folder will be created by the administrator authority user account.
Start explorer.
Create the folder on the desktop, and then name it "scan_folder".
For the folder name, enter between 1 and 12 alphanumeric characters. If the character limit of the folder name is exceeded, you may not be able to access it normally by the varied environment.
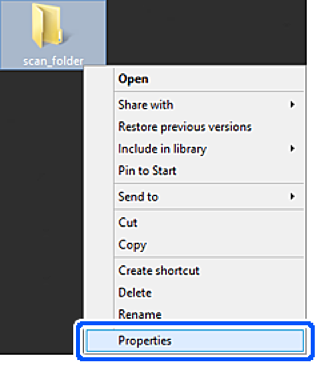
Right click the folder, and then select Properties.
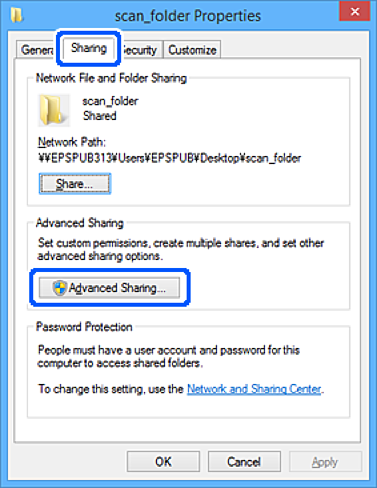
Click Advanced Sharing on the Sharing tab.
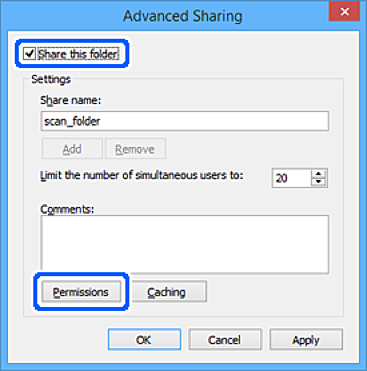
Select Share this folder, and then click Permissions.
Select Everyone group of Group or user names, select Allow on Change, and then click OK.
Click OK.
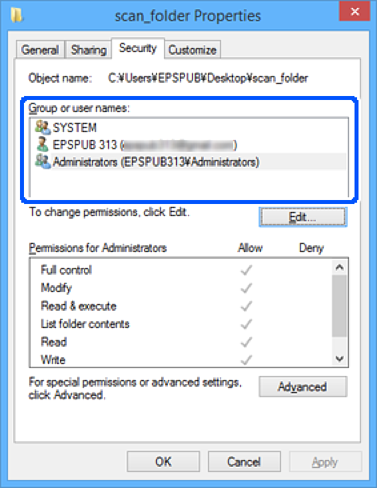
Select Security tab.
Check the group or the user in the Group or user names.
The group or the user that is displayed here can access the shared folder.
In this case, the user who logs in to this computer and the Administrator can access the shared folder.
Add access permission, if necessary. You can add it by clicking Edit. For more details, see Related Information.
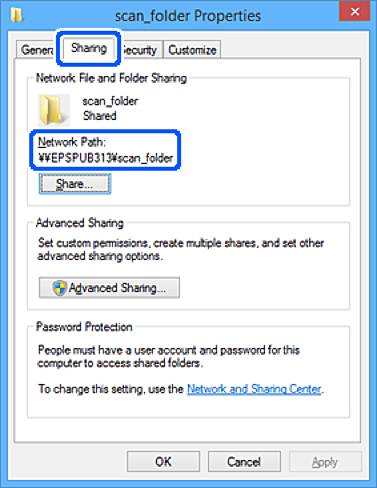
Select Sharing tab.
The network path of the shared folder is displayed. This is used when registering to the contacts of the scanner. Please write it down.
Click OK or Close to close the screen.
Check whether the file can be written or read on the shared folder from the computers of users or groups with access permission.