Step 2. Print the order
When a printer and print settings are registered for each item in Craft Admin, automatic printing occurs according to the registered settings, removing the need for Production Flow operations.

-
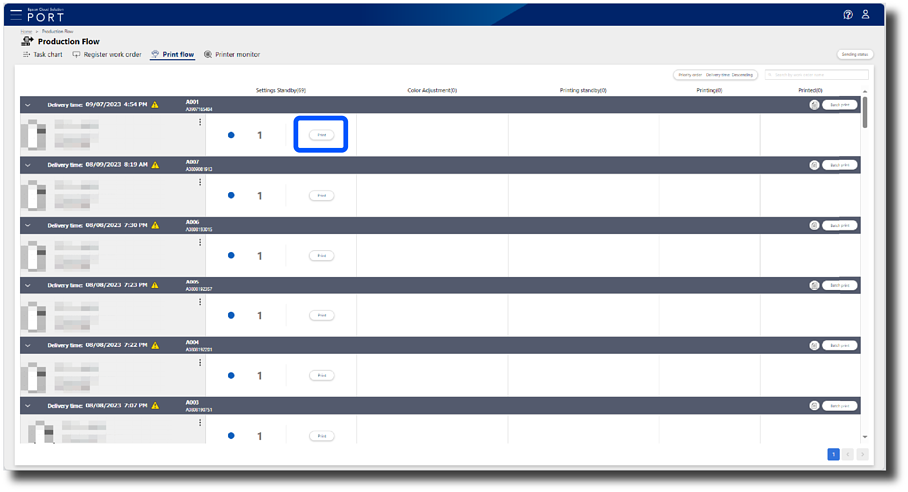
Click Print for the order you want to print.
The print settings screen is displayed.
-
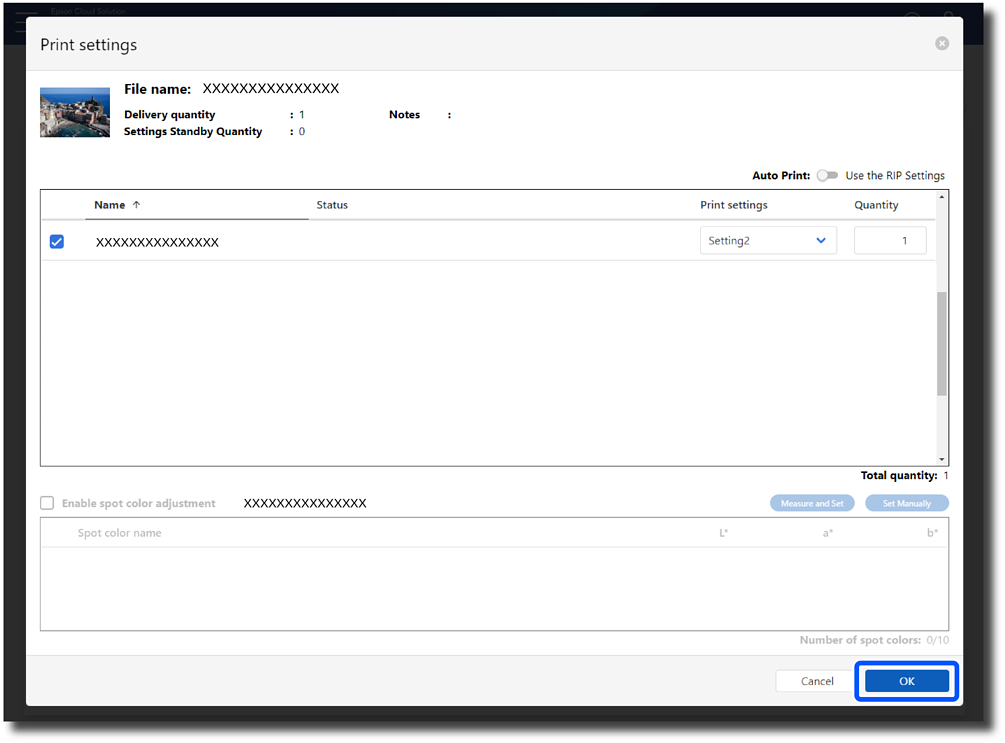
Check the printer you want to use to print, select print settings from Print settings, and enter the number of copies.
To perform distributed printing, enter the number of copies you want to assign to each printer.
Note:-
Print settings allows you to select the print settings registered to the print software for each printer.
-
You can only perform spot color adjustments on one printer. See the following for the spot color adjustment procedure.
-
-
Click OK.
-
Check that the number of copies you have ordered to be printed and the status of the job are displayed in Printing standby.
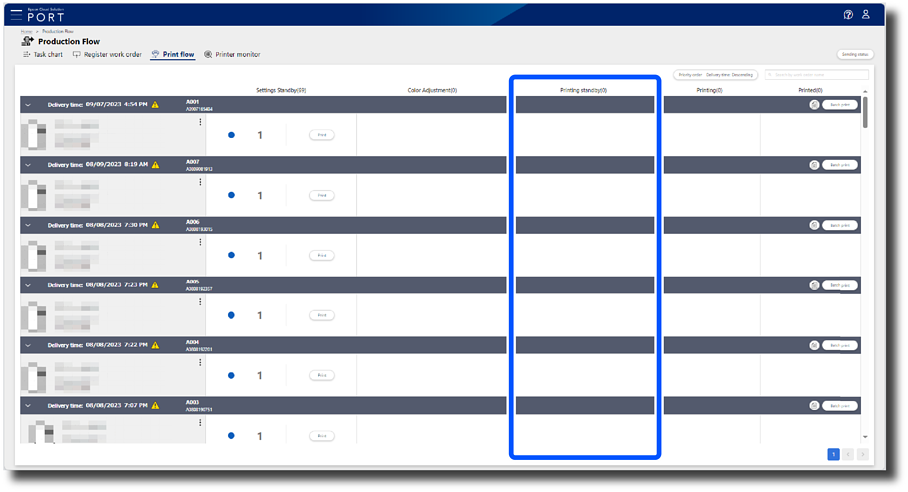
The meanings of the status are as follows.
-
○: This process is in progress.
-
Nothing displayed: This process has not started or is complete.
Note:-
You can check the progress of all processes for each print file on the Task chart screen.
-
You can check information about each printer on the Printer monitor screen.
-
-
When each printer's printing application is set to hold orders, orders sent from Production Flow are not automatically printed.
See the following for the printing procedure.
-
For Print Hub users
-
For OrderController Easy Print System users
-
For Epson Edge Print usersCheck the manual displayed from the Help menu > Help in the app.
-
This completes this procedure.