Step 3. Reflect the print settings in Production Flow
Connect to Production Flow to reflect the print settings you have registered and edited.
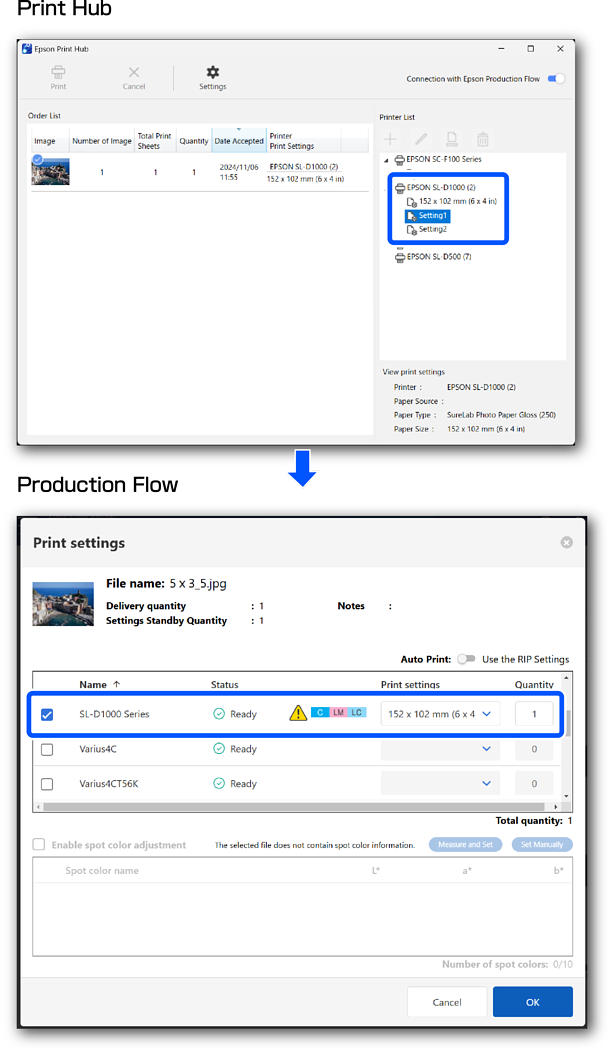
Information set in Print Hub is reflected in Production Flow.
-
Make sure the printer is turned on.
-
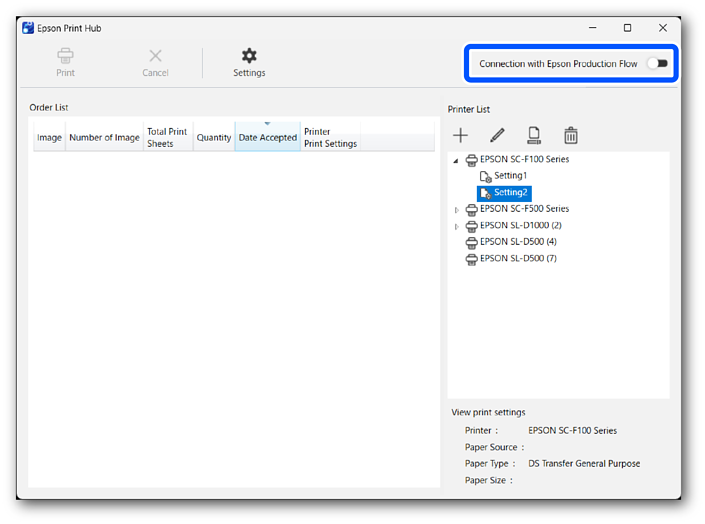
Click Connect with Epson Production Flow to enable it.
-
Click OK in the confirmation dialog.
 Important:
In the following cases, an error message is displayed when connecting to Production Flow.
Error Message
Error Details
An error has occurred. Error code: {0}
Displayed when a connection to Production Flow cannot be established.
A preset with the same name has already been registered. Please change the name of the preset.
Displayed when there are print settings with the same name.
Print settings have not been created. Please create the print settings.
Displayed when no print settings have been registered. Create some print settings.
-
Make sure
 is displayed.
-
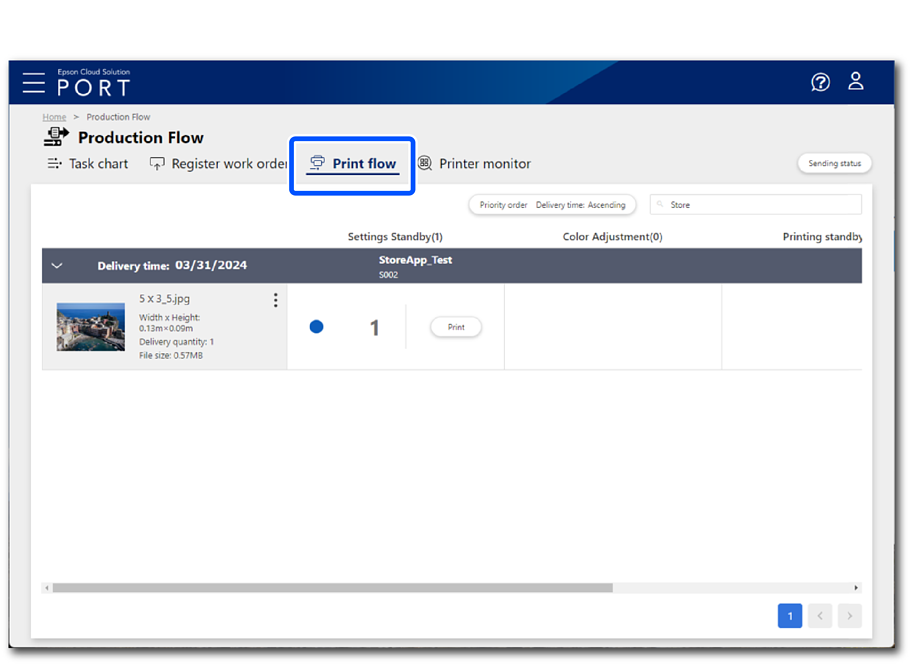
Log in to PORT.
-
Click Production Flow > Print flow.
-
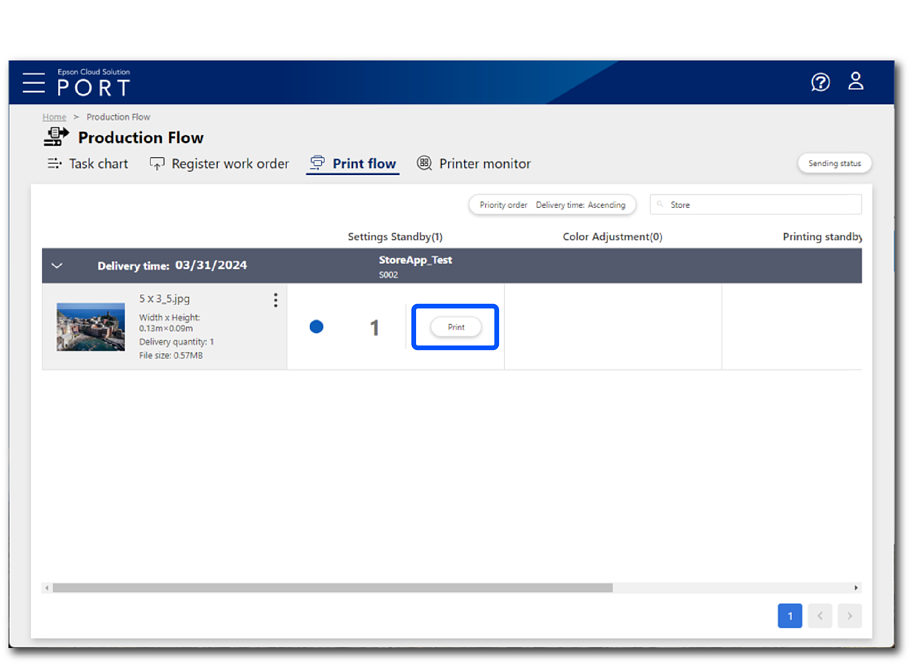
Click Print for the order you want to print.
-
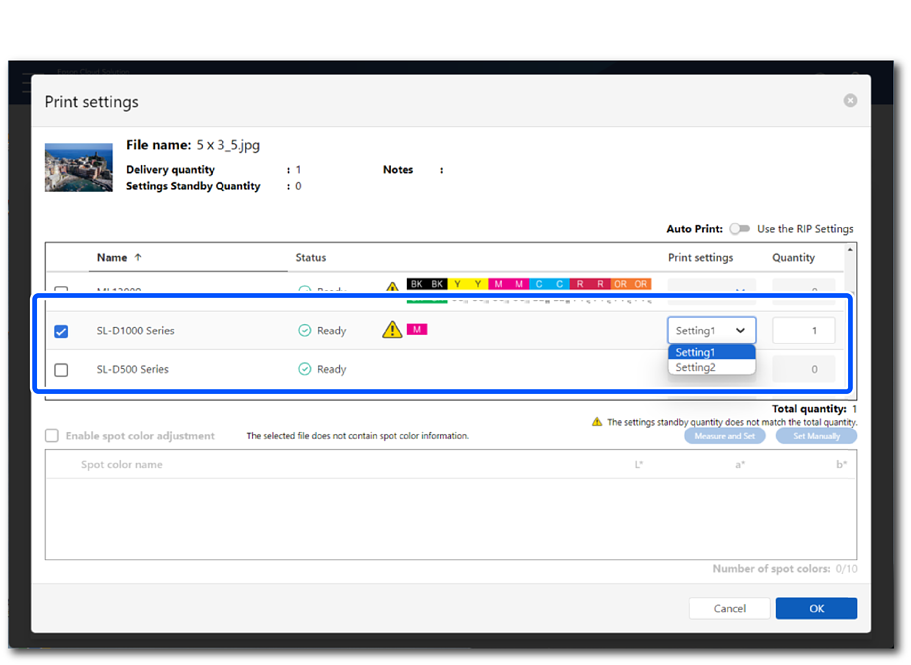
Select the printers registered in Print Hub, and make sure you can select the print settings from the Print settings drop-down menu.

This completes the print settings.
